Master Homemade Cinnamon Rolls: Make-Ahead & Freezing Tips
Imagine waking to the intoxicating aroma of freshly baked cinnamon rolls, their fluffy spirals glistening with sweet, creamy frosting, all without the morning rush. This dream is entirely achievable with homemade cinnamon rolls, and it's far easier than you might think, especially when you master the art of make-ahead preparation and smart freezing techniques. Forget the intimidating reputation; crafting these bakery-quality delights at home brings an unparalleled joy, transforming ordinary mornings into extraordinary indulgences.
The Secret to Unforgettable Cinnamon Rolls: Beyond the Basics
The foundation of any truly exceptional cinnamon roll lies in its dough. We're talking about a rich, tender, almost brioche-like dough that bakes up into pillowy spirals, each roll snuggling against its neighbor, ready to yield a feathery stretch of bread when pulled apart. This isn't just any dough; it’s a carefully crafted canvas, designed to be substantial enough to hold a generous filling yet delicate enough to melt in your mouth.
Crafting the Perfect Dough: A Two-Day Revelation
While the idea of a two-day dough might sound like more work, it's actually the opposite – it’s a brilliant strategy that breaks up the effort and significantly enhances the final product. Not only does this approach allow the flavors to deepen and mature through a slow rise, but it also makes the dough much easier to handle. Working with cold dough, straight from the refrigerator, is a game-changer when it comes to rolling and shaping. You’ll achieve those desirable, tight spirals that characterize bakery-style
Secret to Perfect Spirals: Two-Day Dough & Soft Butter, ensuring every bite is packed with cinnamon-sugar goodness. This extended proofing also contributes to an incredibly tender crumb, a hallmark of truly luxurious cinnamon rolls.
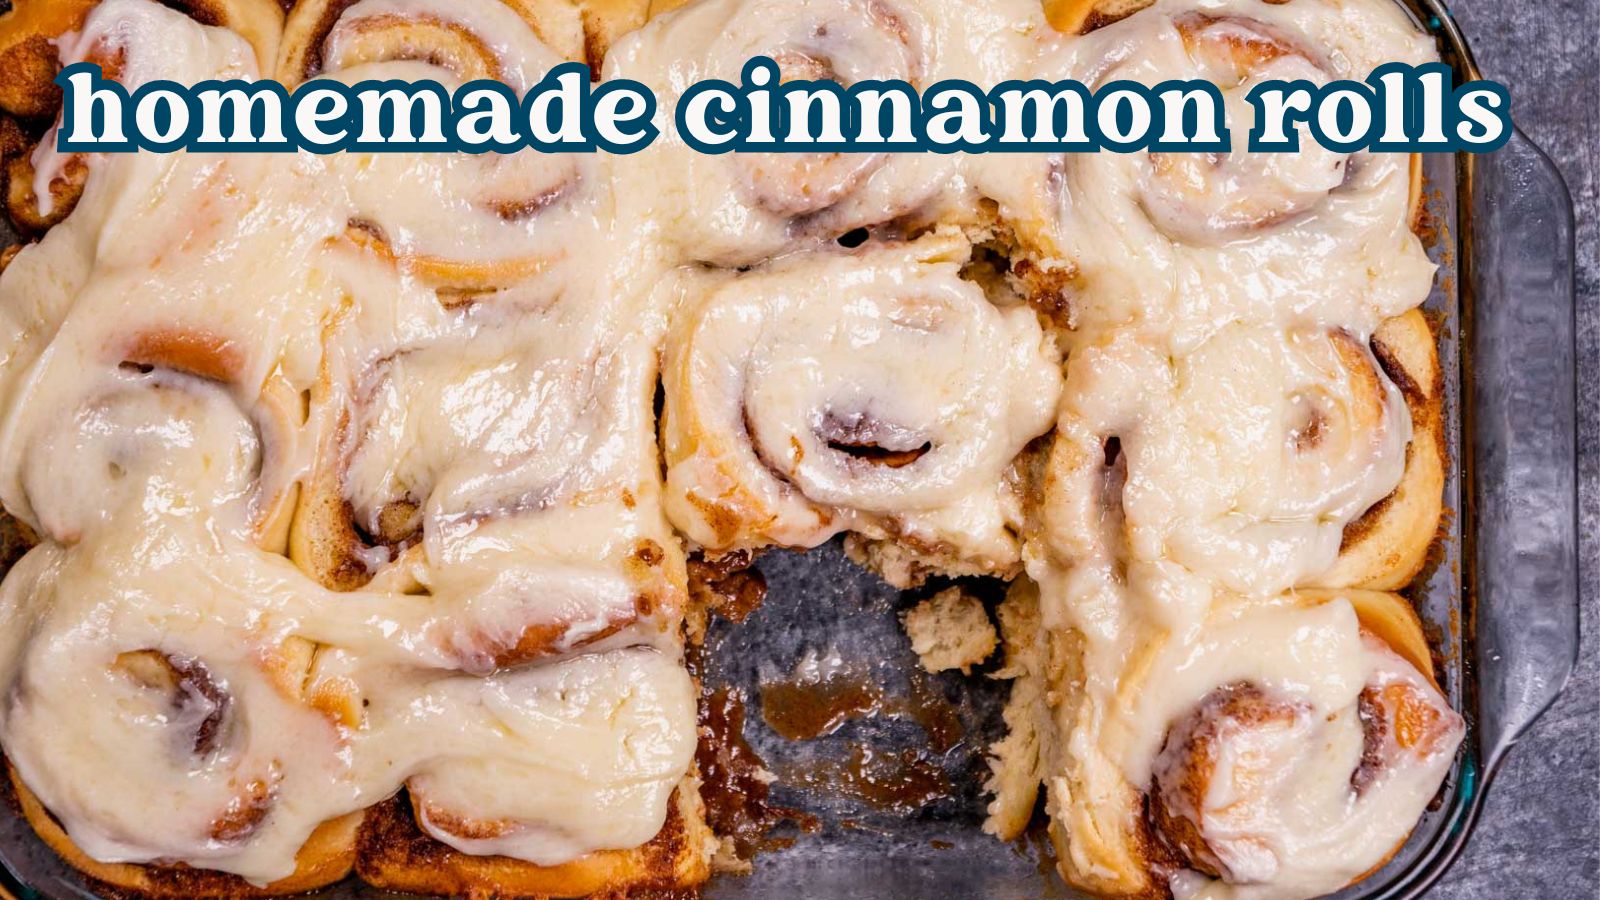
The Art of the Filling and Frosting
Once you have your magnificent dough, the next essential elements are the filling and the frosting. The filling, a luscious blend of brown sugar, butter, and cinnamon, is the sweet heart of these rolls. It caramelizes slightly during baking, creating those irresistible gooey pockets within each spiral.
And then there’s the frosting – typically a rich, tangy cream cheese frosting. The magic happens when you spread this delightful concoction over the cinnamon rolls while they're still warm. The heat from the rolls allows some of the frosting to melt beautifully, seeping into every cinnamony crevice, creating a sticky, sweet glaze that complements the tender bread perfectly. It's this warm, melting embrace of frosting that truly elevates homemade cinnamon rolls from good to utterly divine.
Mastering Make-Ahead Cinnamon Rolls for Busy Mornings
One of the most appealing aspects of homemade cinnamon rolls is the ability to prepare them in advance. This makes them perfect for special occasions like holiday breakfasts, leisurely weekend brunches, or simply ensuring you have a comforting treat ready when the craving strikes. The make-ahead method is a secret weapon against morning stress, allowing you to enjoy fresh-baked goodness with minimal fuss.
Why Plan Ahead?
Preparing your cinnamon rolls ahead of time offers several key advantages. It alleviates pressure on the day of serving, allowing you to enjoy time with family and friends rather than being stuck in the kitchen. Moreover, a slow rise, often achieved through an overnight refrigeration, can lead to a more complex flavor profile and a superior dough texture. For recipes like
The Ultimate Fluffy Cinnamon Rolls: Bakery Taste at Home, this can be a game-changer.
Refrigerating Your Dough
The most common make-ahead strategy involves preparing the dough the day before baking. After the first rise, or even after shaping the rolls, you can cover them tightly with plastic wrap and refrigerate overnight (or up to 24 hours). This slow, cold proofing develops flavor and strengthens the dough. The next morning, simply remove the rolls from the fridge, let them come to room temperature for 30-60 minutes (or longer if your kitchen is cool) to allow for a final rise, and then bake as directed. You'll be rewarded with incredibly light and flavorful cinnamon rolls.
Baking and Storing for Optimal Freshness
While cinnamon rolls are undeniably best enjoyed warm from the oven, they can certainly be prepared and stored for later enjoyment.
* **Room Temperature Storage:** Once baked and cooled (and ideally unfrosted for longer keeping), store your cinnamon rolls in an airtight container at room temperature for up to two days.
* **Refrigerated Storage:** For extended freshness, baked and cooled cinnamon rolls can be refrigerated in an airtight container for up to four days.
* **Reheating:** To revive individual rolls, a quick blast in the microwave for 10 to 15 seconds will soften them beautifully, bringing back that warm, fluffy texture. If you're reheating several, a few minutes in a moderate oven (covered loosely with foil) works wonders. Remember to frost them just before serving if they were stored unfrosted!
Freezing Cinnamon Rolls: Your Anytime Indulgence
Freezing is the ultimate hack for having homemade cinnamon rolls at your fingertips whenever a craving strikes, or for prepping for holidays well in advance. This method allows you to enjoy fresh-tasting treats without the full-day commitment every time.
Freezing Baked (Unfrosted) Rolls
For optimal results and convenience, freeze cinnamon rolls *after* they are baked but *before* they are frosted.
1. **Bake and Cool:** Bake your cinnamon rolls as usual, then let them cool completely on a wire rack. This is crucial to prevent condensation and ice crystals from forming in the freezer, which can lead to soggy rolls.
2. **Skip the Frosting:** Do not frost the rolls before freezing. The texture of cream cheese frosting can change when frozen and thawed, often becoming watery or grainy.
3. **Wrap Tightly:** Once completely cool, wrap each cinnamon roll individually in plastic wrap, ensuring it's sealed airtight. Then, place the wrapped rolls into a freezer-safe bag or an airtight container. This double-layer protection prevents freezer burn.
4. **Freeze:** Store in the freezer for up to two months. Beyond this, their quality may start to decline.
Reviving Frozen Delights
When you’re ready to enjoy your frozen cinnamon rolls:
1. **Thaw:** Transfer the desired number of rolls from the freezer to a plate and let them thaw at room temperature for a few hours, or overnight in the refrigerator.
2. **Reheat (Optional):** Once thawed, you can warm them briefly in the microwave (15-30 seconds per roll) or in a preheated oven (300°F/150°C) for about 5-10 minutes until warmed through. This brings back that fresh-baked warmth and softness.
3. **Frost and Serve:** Prepare your cream cheese frosting fresh, or thaw any pre-made frosting you might have stored separately, and spread it generously over the warmed rolls just before serving. The warmth will help the frosting melt slightly, creating that irresistible gooey finish.
Tips for Bakery-Quality Results Every Time
Achieving those enormous, fluffy, bakery-style cinnamon rolls at home is within your reach with a few expert tips.
Essential Dough Handling Techniques
Don't be intimidated by yeast! The key is using water or milk that is warm to the touch (around 105-115°F or 40-46°C), but not too hot, to activate it. Once the dough comes together, treat it gently. Overworking the dough can lead to tough cinnamon rolls. Knead it just enough to develop gluten, then let time and proofing do the rest.
When it comes to cutting your rolled dough into individual spirals, ditch the knife. A thin string of unflavored dental floss is your best friend. Slide it under the log of dough, cross the ends over the top, and pull firmly to slice through. This method creates beautifully clean cuts, preventing the soft dough from squishing and preserving those perfect spirals.
Achieving the Perfect Spiral and Texture
For those desirable tight spirals, remember the benefit of cold dough. A chilled dough is firmer and easier to roll out evenly and tightly, ensuring more turns of cinnamon-sugar goodness in every slice. Baking until the edges are lightly golden and buttery, rather than deeply browned, will result in a supremely soft and tender crumb, complementing the sweet, sticky center.
The Unsung Hero: Softened Butter
The quality of your butter in the dough plays a significant role in the final texture. For an incredibly rich, fluffy, and tender dough, similar to brioche, very soft butter is essential. This allows it to incorporate fully and evenly, creating a superior crumb. Remember to take your butter out of the fridge a few hours (or even the night) before you plan to make the dough. If you forget or are short on time, slice the cold butter into tablespoon-sized pieces and knead each piece between your fingers for a minute or two until it reaches the desired softness before adding it to your dough.
Mastering homemade cinnamon rolls is a culinary journey that rewards you with immense satisfaction and incredibly delicious results. By embracing make-ahead strategies and smart freezing techniques, you can ensure that these beloved, warm, frosted delights are always within reach, ready to elevate any morning into a special occasion. So, go ahead, gather your ingredients, and prepare to bring the ultimate bakery experience right into your own home.